A lot of my clients ask me how to change all of the fonts in a document… quickly! The issue usually revolves around co-workers who went a little bit crazy with fonts, and organizational rules that insist that only certain fonts be used.
Since this is a two-part question, it must mean I’ve got two answers for you. Plus a bonus!
Removing all local font styling.
If you are ready to get ready of all the work that was put into choosing fonts, making things bold, italic and etc., the Clear All Formatting button in Microsoft Word is your new best friend.
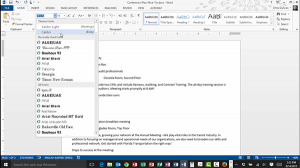
As you can see, I’ve purposefully made some bad font choices in this document. To re-set the bar at zero and make it relatively easy to style:
- Select All of the text by using the keyboard shortcut Ctrl + A or by triple-clicking in the document’s left-hand margin.
- Click the Clear All Formatting button on the Home tab in the Font group.
Change the theme to change the base fonts used by your document.
The other situation involves changing the base fonts used throughout a document. Microsoft Office uses a feature called the Theme to set the base fonts used by a document. To see what I’m talking about, click on the Font dropdown arrow on the Home tab in the Font group. You’ll see two fonts listed at the top under Theme Fonts; one is labeled for use by Headings, and the other is labeled for use for the Body.
These two fonts are what are used by the Styles, which are also listed on the Home tab. If you want to change the fonts used by all of the Office styles, then just update the theme:
- Click the Fonts dropdown on the Design tab in the Document Formatting group.
- As you hover over the different choices, you can watch your document change.
- You can create your own font-set by clicking on Customize Fonts at the bottom of the dropdown.
- For this example, I am going to click on Customize Fonts, and then enter the following information in the Create New Theme Fonts dialog box:
- Heading Font: Times New Roman
- Body Font: Arial
- Name: CDA Computer Tips
- And, voila! The font for all of your text that uses styles has been changed.
Making all new documents use the new theme fonts.
You can force all new documents to automatically use the new theme fonts you created in two simple steps.
- Click the Set As Default button on the Design tab in the Document Formatting group.
- Click Yes.


