And all kinds of other cool documents.
Finding templates is like finding the Golden Ticket in Willy Wonka and the Chocolate Factory. Seriously, they’re that good.
A calendar is a perfect example of the kind of document that screams for you to look into using templates. As you can imagine, getting all of the little boxes sized correctly and the right dates in the right boxes can be harrowing. Enter the template…
To use a template to make a calendar:
- Click the File tab in Microsoft Word.
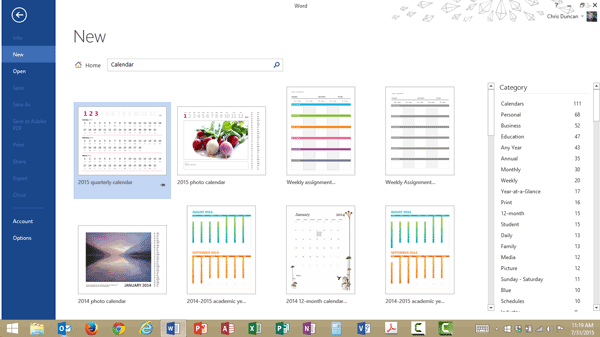
- Click the New button on the left side.
- Type the word Calendar into the search box at the top of the page and press Enter.
- Find the Calendar type that you want and double-click on it.
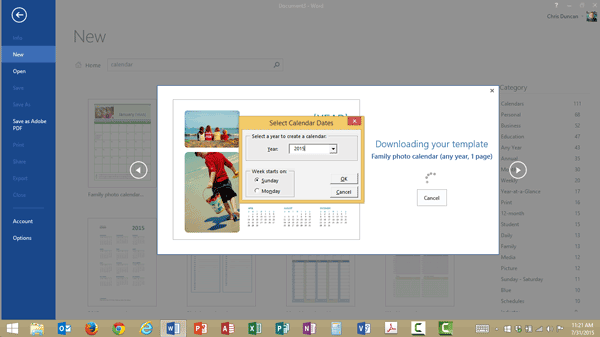
- Watch the little download icon spin for a few seconds…
- Voila! Presto! you’ve made a calendar.
Some calendars actually allow you to change the dates they apply to, and add a new tab to the Ribbon. For this example, I chose to use the Family Photo Calendar (any year, 1 page).
After double-clicking on the Template, a pop-up box asks you
- which Year you want your calendar to cover, and
- what day of the week your calendar should start on.
Click the OK button, and acknowledge any messages that pop up. (If you get a security message asking you to enable Macros, go ahead and click on the Enable Macros button.)
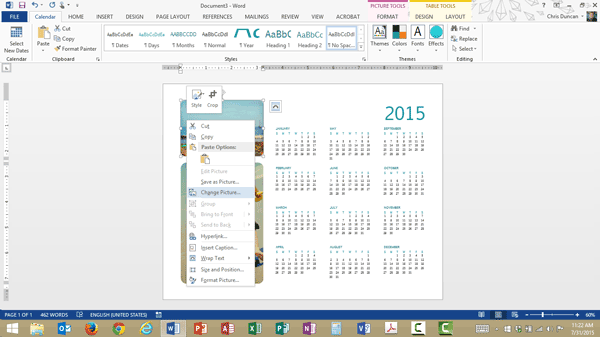
Now you’ve got a beautiful calendar with two great photos on it. Take a moment and poke around on the Calendar tab. There is a button where you can change the dates, as well as convenient options to change the colors and fonts being used.
But wait, you say, those aren’t my kids on the calendar! It’s easy to change the photos and use one of your own photos.
To change the photos on the calendar
- Right-click on the photo.
- Choose Change Picture in the dropdown.
- Click Browse beside From a file.
- Locate one of your favorite photos and put it in place.


