

Every office has a need to create a form at one time or another. The old days of using the underscore key are long gone, and now everyone wants to be able to complete the form using their computer. If you’ve ever been tasked with making a form, you know how difficult it can be to get everything looking good. The secret is in the technique, and being certain you design the structure of your form correctly.
If you haven’t already, please be certain you’ve checked out my previous tips Using Tab Stops and Tab Leaders for Layout in Word, and Creating Custom Styles in Word. Stick around for these next two Tips where I show you how to make a fill-in-the-blank form in Microsoft Word, and convert it to a PDF that anyone can fill out using their computer.
Create your Form Design using Tab Leaders in Microsoft Word
The easy way to create a form’s design is to use Tab Leaders in Microsoft Word. The secret to making a good looking form is to look for the interior alignment of different parts. In other words, try to draw vertical lines down through your form, and line up things accordingly. For our form today I’m going to use a full-line, half-line and one-third-line layout.
Create the Full-Line Layout and Style
Before I get started, I need to know what the width of my active area is. I’ll do that by turning on the Ruler and observing the active area is 6.5” wide.
- Click the More button in the Styles group on the Home tab.
- Click Create a Style from the dropdown.
- Name the Style “Form 1 Line”.
- Click Modify.
- Click the Format button in the bottom left corner of the Create New Style from Formatting dialog box.
- Choose Paragraph from the dropdown.
- Change the Spacing Before to 24 pt.
- Click OK.
- Click the Format button in the bottom left corner of the Create New Style from Formatting dialog box.
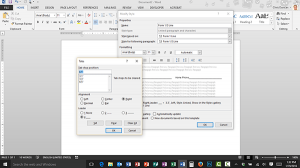
- Choose Tabs from the dropdown.
- Type 6.5” in the Tab-stop position of the Tabs dialog box.
- Click Right Alignment.
- Click Leader #4 ___.
- Click Set.
- Click OK.
- Click OK.
Using the Form 1 Line Style
Observe that it is already selected in the Styles group of the Home tab. If it is not, just click on it.
- Type the text “Name.”
- Press the Tab key.
- Observe how the fill in the blank works.
- Press Enter.
- Type the text “Email Address:”.
- Press the Tab key.
- Press Enter.
Create the Half-Line Layout and Style
The secret to making the half-line and the one-third-line styles work requires you to think about the layout. Since we want a gap between the end of the line and the start of the text, we will be creating two Tab Stops for the end of each interior line, but still only have one Tab Stop at the right-edge of the form.
- Click the More button in the Styles group on the Home tab.
- Click Create a Style from the dropdown.
- Name the Style “Form 1/2 Line”.
- Click Modify.
- Confirm that the dropdown at the top of the Create New Style from Formatting dialog beside Style based on says Form 1 Line. If for any reason it doesn’t, just choose it from the dropdown.
- Click the Format button in the bottom left corner of the Create New Style from Formatting dialog box.
- Choose Tabs from the dropdown.
- Type 3.1” in the Tab-stop position of the Tabs dialog box.
- Click Right Alignment.
- Click Leader #4 ___.
- Click Set.
- Type 3.3” in the Tab-stop position of the Tabs dialog box.
- Click Left Alignment.
- Click Leader #1 None
- Click Set.
- Click OK.
- Click OK.
Using the Form 1/2 Line Style
Observe that Form ½ Line is already selected in the Styles group of the Home tab. If it is not, just click on it.
- Type the text “Work Phone.”
- Press the Tab key, twice.
- Observe how the fill in the blank works.
- Type the text “Home Phone.”
- Press the Tab key, once.
- Press Enter.
Create the One-Third-Line Layout and Style
- Click the More button in the Styles group on the Home tab.
- Click Create a Style from the dropdown.
- Name the Style “Form 1/3 Line”.
- Click Modify.
- Choose Form 1 Line from the dropdown beside Style based on:.
- Click the Format button in the bottom left corner of the Create New Style from Formatting dialog box.
- Choose Tabs from the dropdown.
- Type 2” in the Tab-stop position of the Tabs dialog box.
- Click Right Alignment.
- Click Leader #4 ___.
- Click Set.
- Type 2.25” in the Tab-stop position of the Tabs dialog box.
- Click Left Alignment.
- Click Leader #1 None
- Click Set.
- Click OK.
- Type 4.25” in the Tab-stop position of the Tabs dialog box.
- Click Right Alignment.
- Click Leader #4 ___.
- Click Set.
- Type 4.5” in the Tab-stop position of the Tabs dialog box.
- Click Left Alignment.
- Click Leader #1 None
- Click Set.
- Click OK.
- Click OK.
- Using the Form 1/3 Line Style
- Observe that Form 1/3 Line is already selected in the Styles group of the Home tab. If it is not, just click on it.
- Type the text “City.”
- Press the Tab key, twice.
- Type the text “State.”
- Press the Tab key, twice.
- Type the text “Zip.”
- Press the Tab key, once.
- Press Enter.
If you follow these steps to create your form, you’ll find it very easy to “flex” the spacing by changing the Form 1 Line style. Plus, if you find yourself going back and forth between 1 line and split line layouts, having the styles created allows you to change the tab structure simply by tagging the text with the appropriate style sheet.
Be certain you check out my next two Tips on how to convert your form to a PDF, and how to create Form fields that people can use to fill-in your form. As always, you are welcome to download the example file and play around with it.
